Technology has evolved, and business during
COVID-19 often takes place outside the office. Devices are more mobile and employees often work from home or on the go. This can cause some security vulnerabilities.
Virtual Private Network (VPN) is a great way to connect remote workers to a secure network.
VPN allows a remote host to act as if it were connected to a local, secure network.
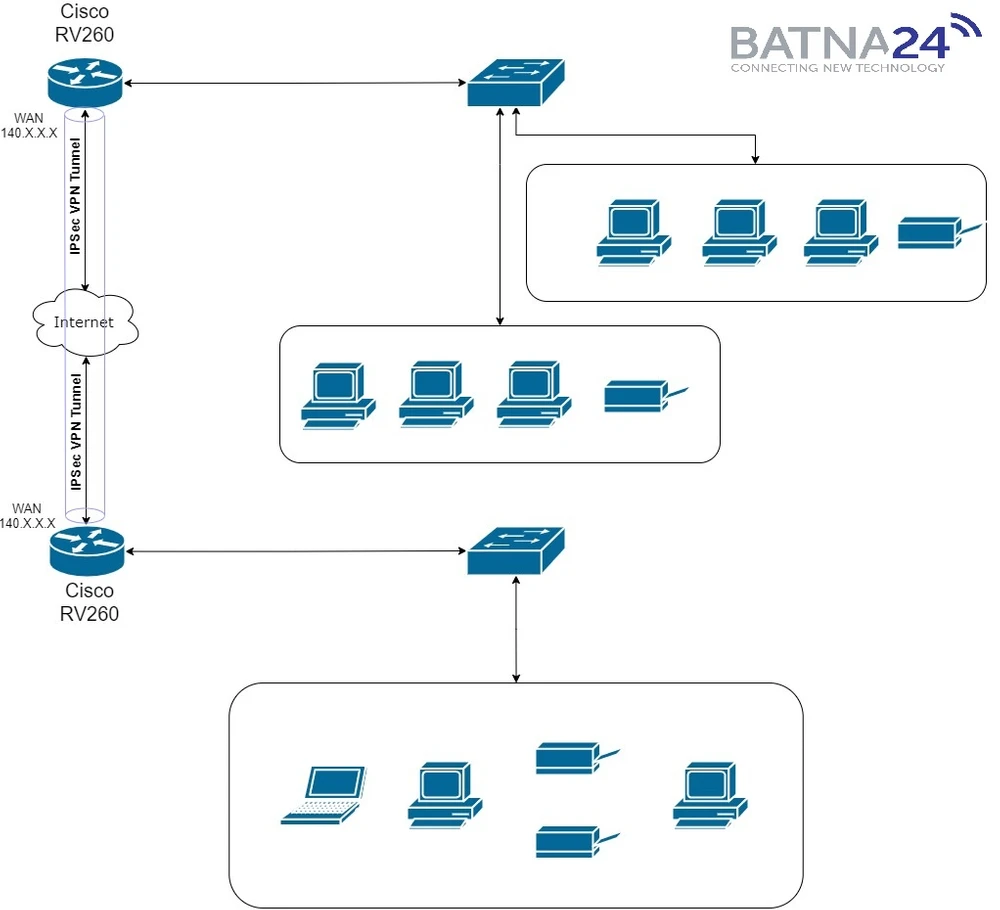
For example, if our client has opened a new branch of their company in another city, but the main servers with information remain in the head office, then it is the
Virtual Private Network that comes to our aid. We've installed a proven
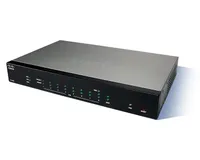
Cisco RV260 router in each of the offices, which is specifically designed for things like establishing VPN connections and switching networks.
How does a VPN work?
A
VPN establishes an encrypted connection over a less secure network such as the Internet. This provides an adequate level of security for the connected systems. The tunnel is set up as a private network that can securely transmit data using industry-standard encryption and authentication methods. A VPN connection typically relies on the Internet Protocol (
IPsec) or Secure Socket Layer (
SSL) to secure the connection.
Network topology
VPN Router - Cisco RV260
The first thing we need is a static public IP address from our provider, only after that we can proceed to the hardware settings.
The
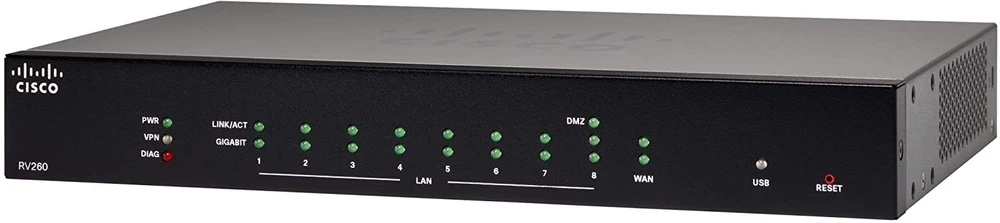
Cisco RV260 router is perfect for our task because it has:
- 8 gigabit ethernet ports that will allow up to 8 switches to be directly connected to it
- A WAN port for connecting internet from your provider. The WAN port allows you to connect an RJ-45 LAN cable or a SFP module with an optical cable from our provider
- A USB port to connect a USB 3g / 4g modem. It is also useful for us to connect a backup line of communication to the Internet (backup).
And most importantly, Cisco RV260 can support up to 20 VPN connections!
VPN configuration on Cisco routers
So let's move on to configuring our
routers. After unpacking, installing in a
rack and performing
basic configuration, we can proceed to configure
VPN connections.
Configuration will be done through the web interface.
And immediately go to the VPN -> VPN Setup Wizard tab
We enter the name of our connection (HomeBatna24) and choose the WAN interface. We can also immediately set up backup Internet access via 3G/4G modem, then we choose the USB interface. After setting all data, we go to next menu by clicking "Next".
The next thing we need to do is select the type of remote connection: by static IP address or domain name (FQDN). In our case, we choose a static IP address, and in the next field we enter the IP address of the remote router in IPv4 format (145.x.x.x). We move to the next menu by pressing the "Next" button.
In the Local and Remote Networks section, we select which local traffic will be available to remote office devices. In our case, all local traffic (Any). We also set the subnet for which our local traffic will be available on the remote network.
In the Profile section, we can select an existing profile for IPSec, but in this case we will create our own.
What is IKE?
IKE is a hybrid protocol that implements
Oakley Key Exchange and Skeme Key Exchange within the
Internet Security Association and Key Management Protocol (ISAKMP). To understand the IKE mechanism more, here are some of the main advantages:
- provides IPsec peer authentication
- negotiates IPsec keys and negotiates IPsec security associations
It is also worth mentioning that
IKEv2 is more efficient because fewer packets are needed to exchange keys and more authentication options are supported. In contrast,
IKEv1 only performs public key and certificate-based authentication.
In our example, we will select
IKEv1 as the IKE version. However, if the device supports IKEv2, then
we recommend using IKEv2. What's important!
Both routers (local and remote) must use the same IKE version and security settings.
IKEv1 configuration
In the Phase I Options section, we select the DH (Diffie-Hellman) "Group2 - 1024 bit" group. DH is a key exchange protocol with two groups of keys of different lengths: group 2 has up to 1024 bits and group 5 has up to 1536 bits. Group 2 has higher speed than group 5, but group 5 is more secure.
Next, we select the encryption option (3DES, AES-128, AES-192, or AES-256). This method determines the algorithm used to encrypt or decrypt Encapsulating Security Payload (ESP) / Internet Security Association and Key Management Protocol (ISAKMP) packets.
Triple Data Encryption Standard (3DES) uses DES encryption three times, but it is now an older algorithm. This means that it should only be used if there is no better alternative, as it still provides a marginal but acceptable level of security. Users should only use it if required for backward compatibility reasons, as it is vulnerable to some attacks.
Advanced Encryption Standard (AES) is a cryptographic algorithm that is more secure than DES. AES uses a larger key size, which ensures that the only known approach to decrypting a message is for the attacker to attempt to use all possible keys. It is recommended to use AES instead of 3DES. In this example we will use AES-192 as our encryption option.
The Authentication Method determines how the header packets of the Encapsulating Security Payload Protocol (ESP) are checked. MD5 is a one-way mixing algorithm that generates a 128-bit summary. SHA1 is a one-way mixing algorithm that generates a 160-bit digest, while SHA2-256 is a 256-bit digest. SHA2-256 is recommended because it is more secure. The same authentication method should be used on both ends of the VPN tunnel.
SA Lifetime (sec) - indicates the amount of time in seconds that the IKE SA is active during this phase. The new SA is negotiated before expiration to ensure that the new SA will be ready for use when the old SA expires. The default value is 28800, the range is 120 to 86400. We will use the default 28800 seconds as the SA lifetime for phase I.
Pre-shared Key - The public key that will be used to authenticate the remote IKE partner. Up to 30 characters can be entered and it is desirable to have upper and lower case letters + numbers + symbols. Both ends of the tunnel must have the same keys.
IKE configuration - Phase II
In the Phase II Options section, we select the appropriate protocol from the list. In our case it is ESP because it is more secure and encrypts the data.
We select AES-192 as the Encryption option. This method specifies the algorithm used to encrypt or decrypt Encapsulating Security Payload (ESP) / Internet Security Association and Key Management Protocol (ISAKMP) packets.
The Authentication Method (Authentication) determines how the Encapsulation Payload Protocol (ESP) header packets are inspected. Use the same authentication method on both ends of the VPN tunnel. We choose SHA2-256 because it is more secure.
The SA Lifetime (sec.) for the second phase should be less than the value for the first phase. The default value is 3600 seconds and this is what we choose.
When Perfect Forward Secrecy (PFS) is enabled. IKE Phase 2 negotiation generates new key material for encryption and authentication of IPsec traffic. Perfect Forward Secrecy is used to increase the security of messages sent over the Internet using public key cryptography. When enabling this feature, we also need to specify DH. In this case this is "Group2 - 1024 bit".
All that remains is to enter the profile name and click "Next".
We validate our configuration and click "Submit".
Configuration of the Cisco RV260 remote router
We've already finished configuring our local router, so now it's time to configure our remote router. Of course, the configuration is analogous to the local router, but we will also present it step by step.
We set the name and type of connection.
In Remote Router Settings, we select the remote connection type (Static IP) and enter the WAN IP address of the router in the main office. We move to the next menu by pressing the Next button.
In the Local and Remote Networks section, we set the parameters required for our network.
We fill in the
Profile (Profile) in the same way we configured the local
switch, with the same keys. We do the same for
Phase II.
On the Summary page, we make sure everything is filled in correctly and confirm by clicking on the Submit button:
Save and verify the VPN configuration
Done! We have successfully created a VPN connection between the two locations. Only 2 small issues remain, but we still need to complete them:
- Save the hardware configuration. If we don't do this, we will lose all the settings after rebooting the device.
- Checking the correct operation of our VPN connection
To save the configuration of the device, we go to the
Administration> Configuration Management tab. We set the parameters accordingly:
Source: Running Configuration and
Destination: Startup Configuration. After setting all the parameters, click
Apply.
As I mentioned, we were able to successfully set up the VPN Site-to-Site connection using the VPN setup wizard. So it's high time to check if you're sure everything is working correctly. Go to the VPN> IPSec VPN> Site-to-Site tab. If everything works correctly, then we should see the status Connected.
At the very end, go to the Status and Statistics > VPN Status tab. You can see there information about the status of the VPN connection. In our case, we see that our Site-to-Site tunnel is in Enable and UP state.


 Click to enlarge!
 Click to enlarge!
 Click to enlarge!
 Click to enlarge!
 Click to enlarge!
 Click to enlarge!
 Click to enlarge!
 Click to enlarge!
 Click to enlarge!
 Click to enlarge!
 Click to enlarge!
 Click to enlarge!
 Click to enlarge!
 Click to enlarge!
 Click to enlarge!
 Click to enlarge!
 Click to enlarge!
 Click to enlarge!
 Click to enlarge!
 Click to enlarge!